How to localize your WordPress themes and plugins
Jul 7, 2019
Usually there are two main reasons on why you would want to localize your WordPress themes and plugins:
- You’re building a theme or a plugin that’s going to be used by a wider public where people doesn’t necessarily speak your language
- You’re building a multilingual website
Making your theme or plugin translateable doesn’t usually take too much of an extra effort, so I usually recommend to make the theme/plugin translation ready right from the start even if you don’t currently plan on translating it. Wrapping text strings with __(), _e() and other functions makes a tiny overhead compared to using plain text strings, but you’re going to thank yourself for using them the day your client asks you to make their website multilingual.
In this article I’m going give you an overview on my theme/plugin localization process with Poedit, which is a free translations editor for po/mo files. The process for localizing themes and the process for localizing plugins is really similar, so I’ll try to combine both into a single post so you don’t have to waste any extra time on learning them individually.
The basics
First, add text domain to your theme style.css like this:
/*
Theme Name: My Theme
Author: WPastronaut
Text Domain: my-theme
Domain Path: /lang
*/
or to the top of your main plugin file like this:
<?php

/*
Plugin Name: My Plugin
Author: WPastronaut
Text Domain: my-plugin
Domain Path: /lang
*/then add this into your theme functions.php:
<?php

add_action( 'plugins_loaded', function() {
 // File name example: sv_SV.po and sv_SV.mo
 load_theme_textdomain( 'my-theme', get_template_directory() . '/lang' );
});
or this into your plugin entry file:
<?php

add_action( 'plugins_loaded', function() {
 // File name example: my-plugin-sv_SV.po and my-plugin-sv_SV.mo
 load_plugin_textdomain( 'my-plugin', false, basename( dirname( __FILE__ ) ) . '/lang' );
});
And then just start wrapping your text strings with WordPress string translation functions like this:
<?php _e( 'My text string', 'my-theme' ); ?>or like this:
<?php

$myText = __( 'My text string', 'my-plugin' );
Easy enough? Now your theme/plugin is ready to be translated.
The POT/PO/MO files
POT/PO/MO files are documented really well here, but as a quick refresher:
- .pot is a template that doesn’t have any translations and it’s used as a template for new translations. It’s an optional file and you can create new po/mo files withouth but it’s really nice to have if you’re building your own starter theme/plugin boilerplate or if you’re going to release your theme/plugin publicly.
- .po is similar to .pot but it contains also translations for a certain language. You can also use .po as a template similarly you would use .pot.
- .mo is a machine compiled file of a .po file. It’s generated and updated automatically by Poedit so you don’t have to worry about it too much.

There are multiple ways for generating and updating POT/PO/MO/ files. One of the most common ways is to use an external program like Poedit, but some people prefer to use a plugin like Loco Translate to allow their clients to add and edit translations right from the wp-admin.
I’m going to show you two ways to make translations with Poedit:
- By creating a POT file first and then using it as a template for translations.
- By skipping the POT file, creating a PO/MO files for a single language and that PO file as a template for translations.
The “Create and use POT file” option
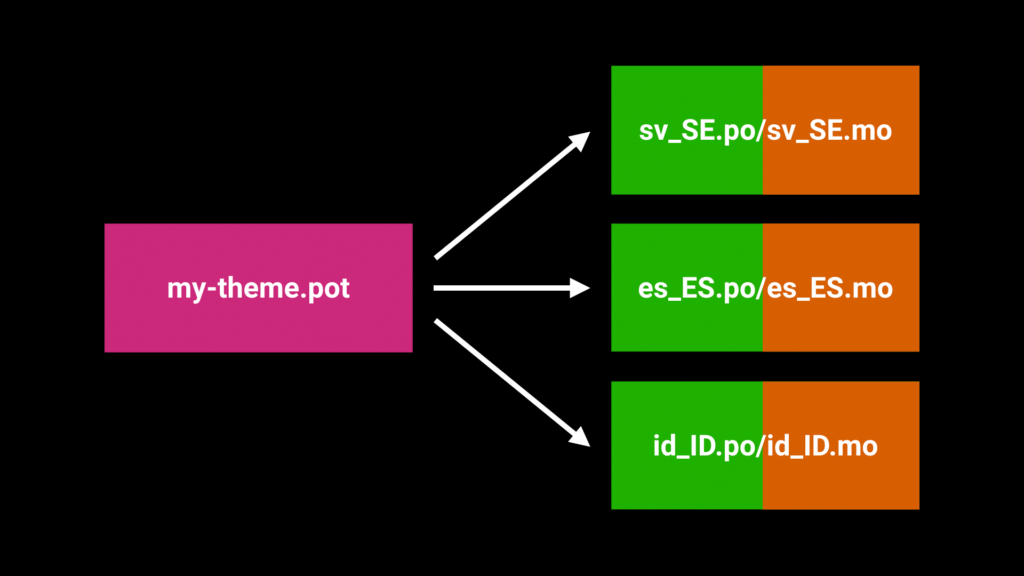
Creating a POT file
Note: I’m using Poedit version 2.2.3 for this tutorial.
Using Poedit to create POT files used to be easy, but now it seems to be almost impossible to do so. At least with the free version of Poedit. As a workaround you can download my ready made .pot template file:
1.) Unzip the my-theme.pot.zip and move the .pot file into the lang/ folder in your theme/plugin folder (create that folder if it doesn’t already exist), name it after your text domain (eg. my-theme.pot or my-plugin.pot) and open it with Poedit.
2.) In Poedit go to Catalog -> Properties and open the Translation Properties tab.
3.) Change the Project name and version into something that will suit your project
4.) Open Sources Paths tab.
5.) Add more paths into Excluded paths if needed.
6.) Click Ok.
7.) Click Extract from sources (if you don’t have any source text strings yet).
8.) Click Ok (and after this you should see some source texts if your theme/plugin contains any).
9.) Save the file.
10.) Your POT file should be now ready to be used for translations.
Making translations from a .pot file
1.) Go to File -> New From POT/PO File and open up your existing .pot file.
2.) Select the target language and click “ok”.
3.) Start translating.
4.) Go to File -> Save, use your_LANG (eg. sv_SV) as a name if you’re creating a translation for a theme or text-domain-your_LANG (eg. my-plugin-sv_SV) if you’re creating a translation for a plugin and save it in the /lang folder.
5.) Your translations should be now ready.
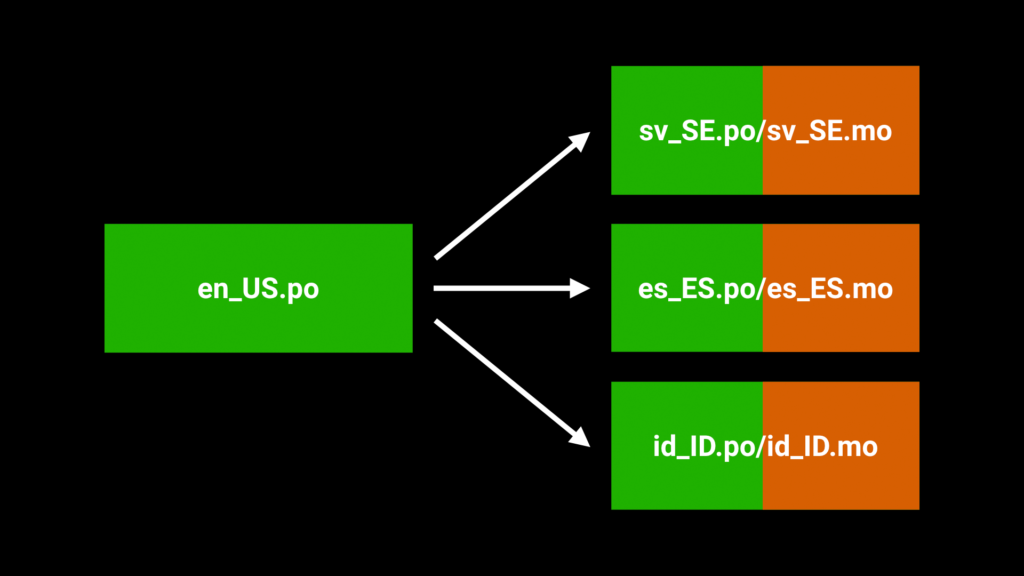
The “Skip the POT file” option
Note: I’m using Poedit version 2.2.3 for this tutorial.
Create the first PO/MO translation
1.) Open Poedit.
2.) Go to File -> New....
3.) Pick the first target language from the prompt and click Ok.
4.) Go to File -> Save as and head into you theme/plugin lang/ folder or create a lang/ folder (eg. wp-content/themes/my-theme/lang/) if you don’t have one. Use LOCALE (eg. en_US) as a name if you’re creating a translation for a theme or use text-domain-LOCALE (eg. my-plugin-en_US) as a name if you’re creating a translation for a plugin. Finally click Save.
5.) Click Extract from sources.
6.) From Sources Paths tab under the Paths box click + and choose Add Folders.... From the folder explorer pick the parent folder of that lang/ folder (eg.wp-content/themes/my-theme/lang->wp-content/themes/my-theme) and clickOpen`. This allows Poedit to use the whole plugin/theme folder as a root for the string extraction.
7.) Add everything you don’t wish to include into the extraction process to Excluded paths, eg. everything that isn’t a .php file. Some inspiration:
Folders:
- node_modules/
- bower_components/
- assets/
- dist/
- lang/
Wildcards:
- *.js
- *.json
- *.md
8). Now go to Sources Keywords tab and add these into Additional keywordssections with the + button:
- __
- _x:1,2c
- _e
- _ex:1,2c
- _n:1,2
- _n_noop:1,2
- _nx:1,2,4c
- _nx_noop:1,2,4c
- esc_attr__
- esc_attr_e
- esc_attr_x:1,2c
- esc_html__
- esc_html_e
- esc_html_x:1,2c
9.) Uncheck the “Also use default keywords for supported languages”.
10.) Click Ok.
11.) Save the file with File -> Save just to make sure you don’t lose your hard work of adding those additional keywords.
12.) Start translating.
13.) Save the file.
14.) Your first translation should be now ready and the PO file should now be ready to be used as a template for other translations.
Making additional translations from a .po file
1.) Go to File -> New From POT/PO File and open up your existing .po file.
2.) Select the target language and click “ok”.
3.) Start translating.
4.) Go to File -> Save, use your_LANG (eg. es_ES) as a name if you’re creating a translation for a theme or text-domain-your_LANG (eg. my-plugin-es_ES) if you’re creating a translation for a plugin and save it in the /lang folder.
5.) Your translation should be now ready.
